Chain-link fences are the most budget friendly of all the manufactured materials. It is easy to mass produce and therefore have the lowest down payment. However, they are not a great option for families with kids and pets. If not produced properly, chain link fences can have sharp points that can catch paws or fingers on the metal. However, a chain link fence is one of the easiest fencing materials to install yourself. Similar to the wrought iron fencing, chain link fences come in pre-made panels and you simply need to hook them up to the posts once they’re installed.
About Installing Chain-Link Fence
What makes installing a chain link fence difficult is the special hardware needed to hook the panels up to the posts. Plus, the added optional addition of a top rail can complicate things even more. If your area is not enclosed, make sure you know the difference between an end rail and the other parts of the top rail as well.
Preparation:
Share any fence plans with bordering neighbors to mitigate any future disputes. Installing a chain link fence requires planning and preparation. Some local building codes place restrictions on fence height, location and other factors. Check with your local building department to determine if a permit is necessary. Find your property line. Figure out where you want your fence positioned in relation to your property line. Your local assessor’s office can provide information on your property line. Determine the fence size and what kind of material you’d prefer. Fence height is based on the chain link fabric size. Chain link fabric or mesh comes in linear feet. It’s usually sold in rolls 4-feet, 5-feet or 6-feet high. Galvanized steel is the strongest mesh. Buy enough to cover the fence perimeter less any gate openings. Aluminum is lighter. Before digging holes, call 811. Your local utility company will mark where any water, gas, and power lines are in your yard.
 Shopping at Direct Fence:
Part of knowing how to build a chain link fence is understanding which parts you will need.
- Line Post Cap holds the top rail in place. Use one of these for each line post.
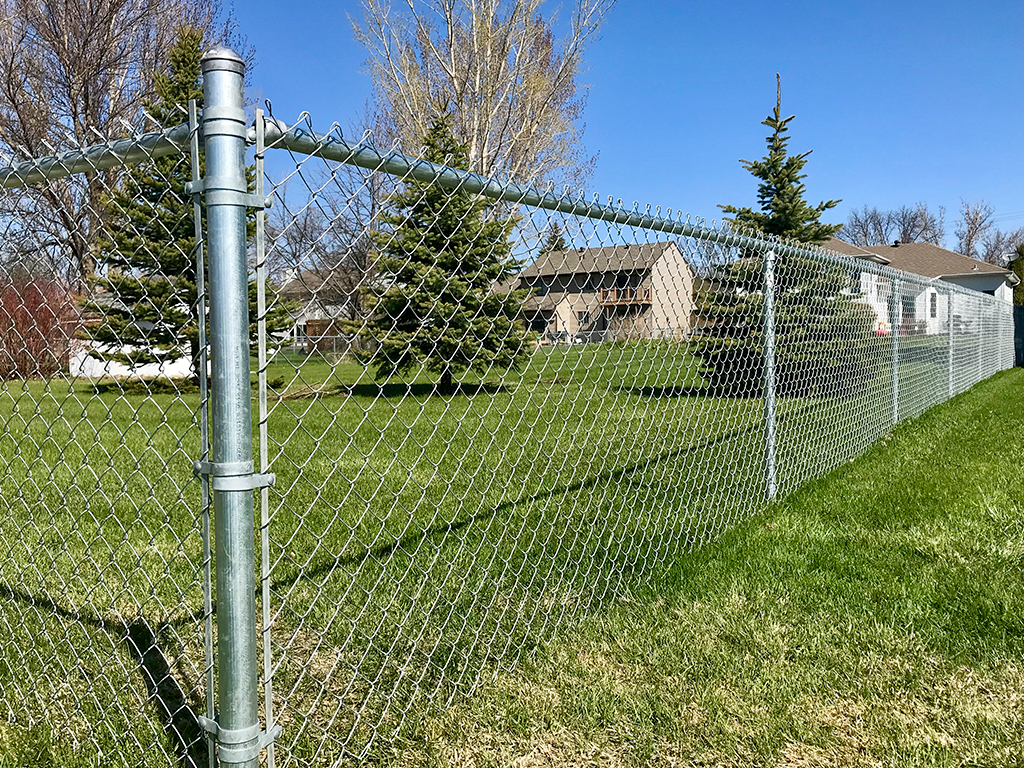
- Top Rail runs along the top of the posts. Use the same linear footage of this as you will for the entire fence.
- End Post Cap is also called a “terminal cap”. Use one of these for each end post.
- Rail Ends cap the rail at each end post, gate post and corner post. Use one for each end post, one for each gate post, and two for each corner post.
- Tension Bands hold the tension bar. Use three for each end and gate post. Use six for each corner post for fences up to 4 feet tall. Use four per end and gate posts. Use eight per corner for fences up to 5 feet tall. Use five per end and gate post. Use ten per corner post for fences up to 6 feet tall.
- Tie Wire ties the chain-link fabric to the top rail and line posts. Use one for every 24-inches of the top rail and one for every 12-inches of each line post.
- Chain Link Fence Posts support the top rail and chain-link fabric. Use one of these within every 10-foot run of fence.
- Tension Wire adds rigidity to the bottom of the chain-link fabric along the bottom. Use the same linear footage of this as you will for the entire fence.
- End Post / Corner Post adds support and rigidity to the chain-link fabric. Use one for each end of the fence, at each corner. Use two for each gate opening.
- A tension Bar is a vertical bar woven into the ends of the fence fabric at each end post, gate post and corner. Use one for each end post and gate post and two for each corner.
- Top Rail Sleeve connects two runs of top rail. Use one of these for every two top rails that need to be joined.
- Gates come pre-assembled. Use one for each opening you wish to create. You can create a double opening using two gates.
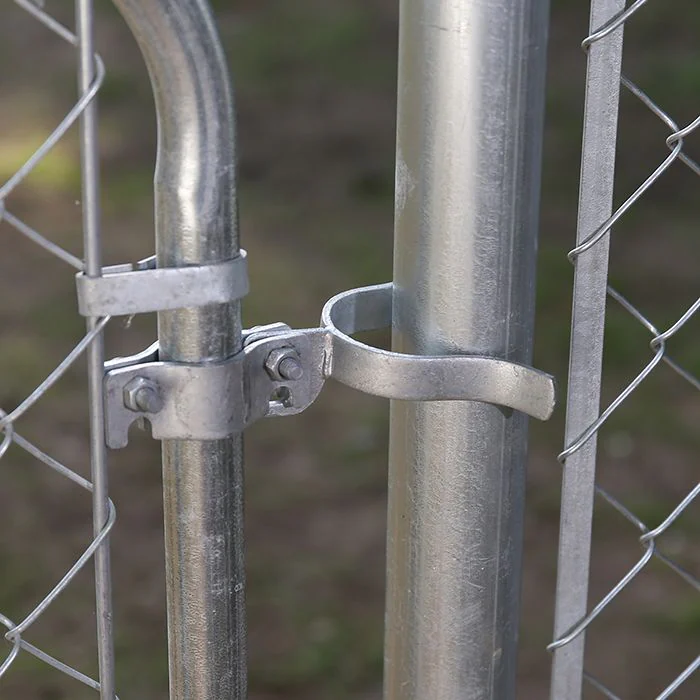
- Gate Post Hinge to mount to the post. Use two for each swinging gate.
- Gate Frame Hinge to mount to the gate. Use two for each swinging gate.
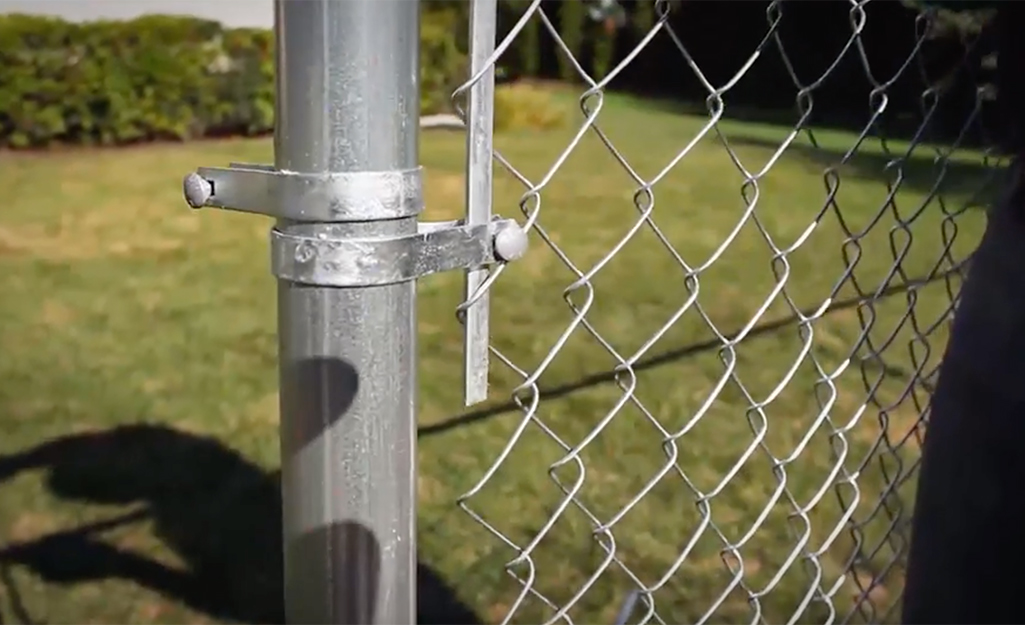
- Brace Bands hold the rail ends and mount above the tension band.
Map it out
Most instructions on how to put up with a chain link fence begin with determining the layout.
- Set your fence about 4-inches away from your property line to avoid any property line issues with neighbors. This distance will likely be dictated by your local building code and so may be slightly different.
- Lay out the fence perimeter using batter boards and mason’s line. If running your fence parallel to the house, start with this line first. Then run perpendicular lines to complete the perimeter, crossing the mason’s line at the corners.
- Square the corners using the 3-4-5 method. Measure 3-feet from where the lines intersect and make a mark on the string line. Measure 4-feet along the line that runs perpendicular to that line and make a mark. Measure between the 3-foot and 4-foot marks. adjust the line until the marks are exactly 5-feet apart.
- Mark fence post locations based on fence panel dimensions using spray paint. Use a fence post that’s no more than 10-feet high.
- When laying outposts for the chain link fence gates, leave an extra 3 3/4-inches between the posts. This will make room for the hinges and latch. Refer to manufacturer’s instructions for specific measurements.
Digging
Posts come in two diameters. The wider diameter, 2 3/8-inches, is for corner and end posts. The smaller diameter is 1 5/8-inches and is for line posts or the other posts in the fence. An important step knowing how to build a chain link fence is digging the post holes correctly. You can use a post hole digger or two-person auger.
- Dig post holes three times wider than the post diameter. Dig 6-inches to 8-inches for end and corner posts. Dig 4-inches to 6-inches for line posts.
- Make the holes a third of the length of the pole length plus 4-inches for gravel.
- Fill all the holes with 4-inches of gravel. Tamp using a hand tamper or 4-foot x 4-foot post.
- For the end, corner and gate posts, add 6-inches of concrete to the hole. Leave the other holes empty.
Concrete
Setting the end, corner and gate posts in concrete is the key to a strong and sturdy chain link fence system. Ensure that these posts are properly set and that the concrete is completely cured before moving forward.
- Make sure the concrete mix is not too thin. It should be the consistency of thick cake batter. Follow the manufacturer’s instructions or purchase ready-made cement.
- Put posts in the wet concrete and plumb them with a level. Have a helper hold the posts plumb or brace them using stakes.
- Finish filling in the corner, gate and end post holes with concrete.
- Check the posts for plumb, that is even and straight, after every few shovelfuls and adjust as needed.
- Slope the top of the concrete so water drains away from the posts.
- Let the concrete cure for two to three days, or according to the manufacturer’s instructions.
- Do not fill the holes for the line posts with concrete, and don’t put the line posts in place.
 Hardware for Chain Link Fence
Tension bands hold the tension bar in place. They give the fence fabric its vertical rigidity.
- Slide tension bands onto each corner, gate and end post. The bands will help hold the mesh in place once it’s installed. You will use three for a 4-foot fence, four for a 5-foot fence, and five for a 6-foot fence.
- Put fence gate hinges and latch hardware onto the gate posts at roughly their final positions. Hinge height will depend on your gate dimensions and design.
- Slide a brace band over each end and gate post and two over each corner post.
- Use a rubber mallet to drive end post caps onto the gate, corner and end posts.
- Drive looped line caps onto the line posts with a mallet. Put the posts in their holes, but don’t fill the holes.
- Bolt a rail cap to each brace band, tightening just enough to hold the cap in place. Feed the rails through the looped caps.
- Cut rails with a pipe cutter or hacksaw, if needed. If you need longer rails, join them together. Use rails with a slightly smaller wedged end that fits into a full-size rail or with a top rail sleeve.
- Be sure to deburr the ends of all cuts using a file if necessary.
- Fit the rails into the rail caps. Raise or lower each cap to the final height of the mesh. Allow 2-inches of clearance at the bottom.
- Tighten the brace bands to secure the rail height.
- Fill the holes around the line posts with dirt and tamp until firm. Be sure to keep the posts plumb as you fill the hole in.
Chain Link Fence Mesh:
- Lay the chain link mesh on the ground outside the fence.
- Weave the tension bar through the links at the end of the mesh.
- The bar makes the end of the fence rigid and provides something to attach to the posts.
- Stand the mesh up. Slide the tension bar between the openings on the tension bands.
- Run a bolt through each tension band to lock the tension bar in place.
- Use a socket wrench to bolt the tension bar into the tension bands on one of the end posts.
- Align the mesh so it overlaps the rail by 1-inch to 2-inches and sits about 2-inches above the ground.
Tighten:
If the mesh changed height or became distorted during tightening, pull on it to reshape it. Without releasing the fence puller, weave a tension bar through the mesh. Make sure it’s close enough to be fastened to the tension bands on the end post nearest the fence puller.
- Chain link fence fabric must be pulled taught, or it will sag. You can do this using a come-along cable puller winch and stretcher bar.
- Insert a tension bar about 3-feet short of the corner or end post you are going to end the mesh on.
- Hook the stretcher bar to it.
- Crank the cable puller until the loops of the mesh move no more than 1/4-inch when you squeeze them together.
- To remove the excess mesh between the tension bars and end post, open a loop at the top and bottom. Twist and pull the strand free.
- Pull the tension bar into the tension bands on the end post by hand.
- Tighten the bolts on the bands with a socket wrench.
- Release the fence puller and remove the tension bar and stretcher bar.
- Repeat the entire hanging and stretching process along the remaining sides of the fence.
Finishing Your Chain Link Fence
- Bend one end of an aluminum tie wire into a hook. Grab the bottom strand of the opening above the rail.
- Loop the tie wire around the top rail. Pull it firmly and tie it back onto the mesh.
- Space the tie wires about every 24-inches along the top rail and then attach them to the line posts every 12-inches to 16-inches.
The final step is to wire the bottom loops of the fence fabric.
- Thread a tension wire through the bottom loops of the mesh and tighten it around the end posts.
- Wrap the wire around itself several times to fasten it.
- An alternative to threading the wire is to attach it to the mesh every two feet or so with hog rings.
Now that you know how to install a chain link fence, you are one step closer to a new fence. Chain link fences can be a budget-friendly option to define your property, keep pets in and give you more security. However, a chain link fence won’t give you much privacy. Consider using chain link fence accessories such as privacy slats. Weave the slats on a diagonal through the mesh.
Don’t worry if you don’t own all the tools needed to complete this DIY project. Rent tools for any project at Direct Fence. If figuring out how to put up a chain link fence isn’t for you, we offer installation services.
Looking for Professional Help for Installing Chain Link Fence in the New Jersey Area?
If you’re looking for a professional fence installer, Direct Fence is here to take care of you. Our years of experience in the fence business have helped us create a fence installation process that is truly second-to-none. From small residential fences to large commercial fencing, we provide superior fence installation. We provide fence installation services in the area of new construction homes, existing homes, condominium/apartment complexes, commercial/office buildings and development/perimeters. We specialize in installing vinyl fencing, wood fencing, aluminum fencing, chain link fencing, and more! Our fence installations are done by seasoned professional contractors. We serve much of NJ including North Jersey, South Jersey, and the Jersey Shore areas, as well as Staten Island. New Jersey service counties include: Monmouth County, Essex County, Morris County Sussex County, Middlesex County, Union County, Warren County, Bergen County, Ocean County, Mercer County, Hunterdon County and more! For more information or to receive a free quote, give Direct Fence a call or fill out our contact form.
NJ Vinyl Fence Supplier & Installation Company Home
Other Posts: